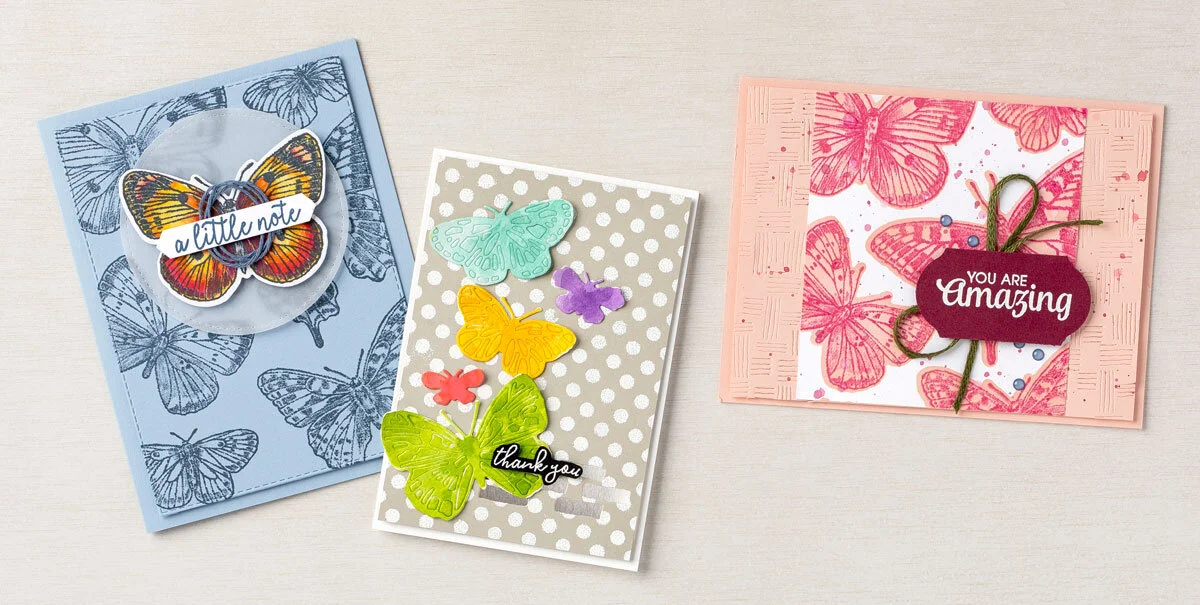
Parts & Pieces: Words of Cheer

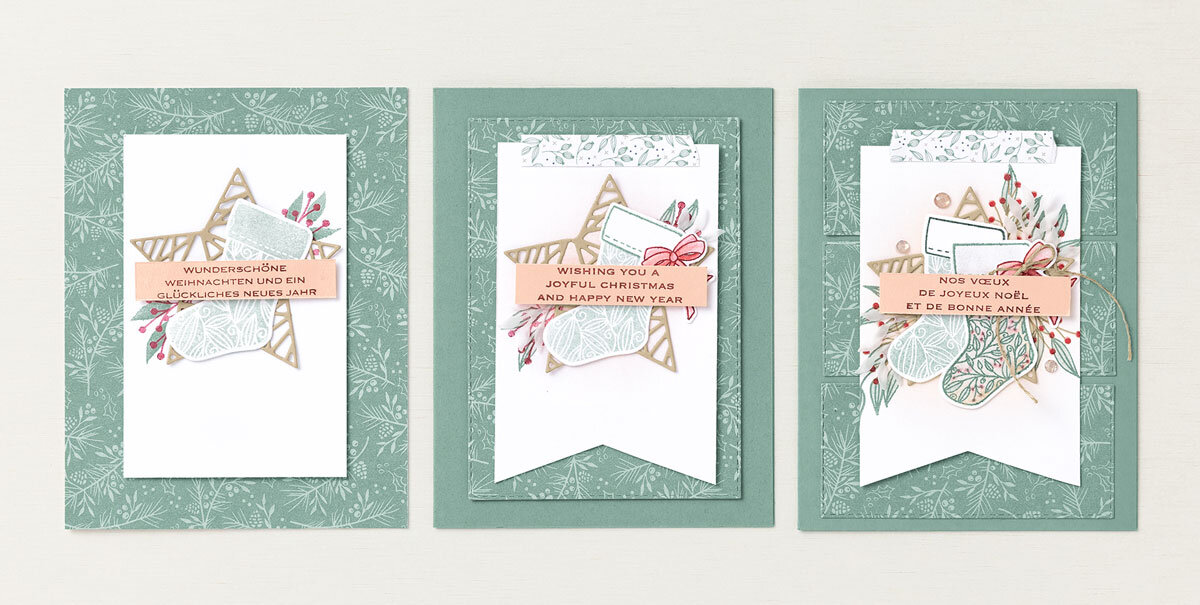
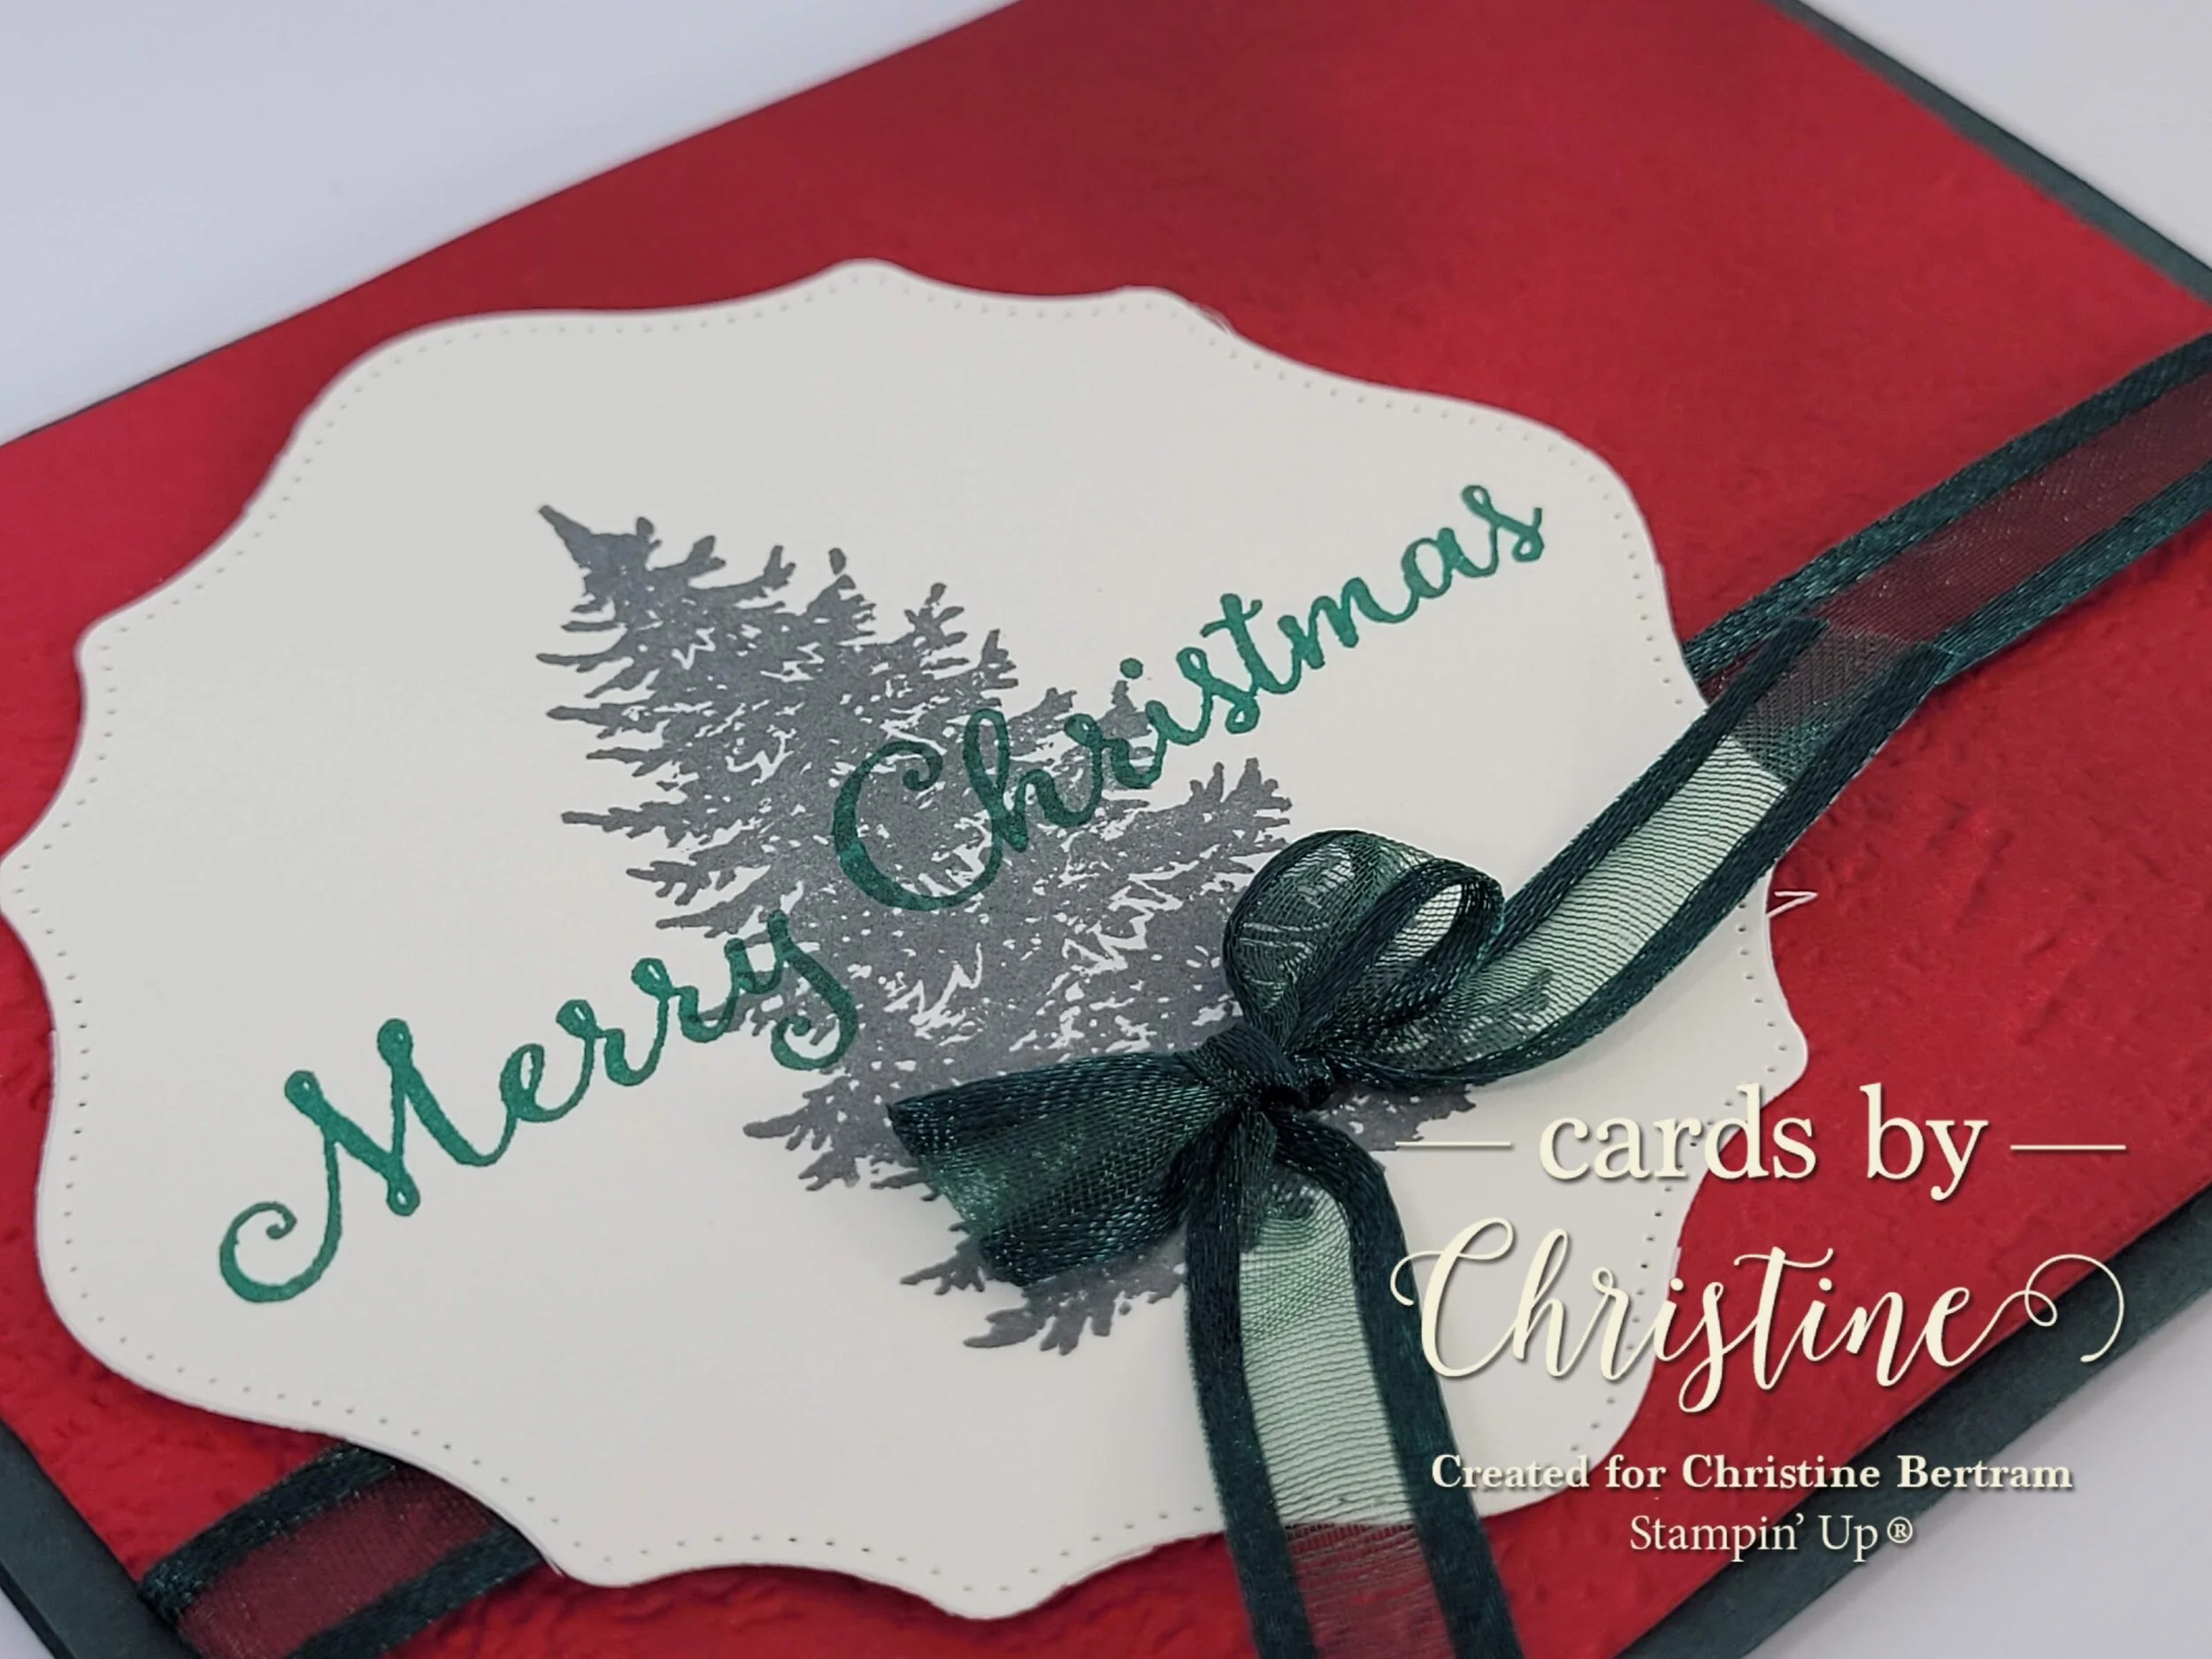
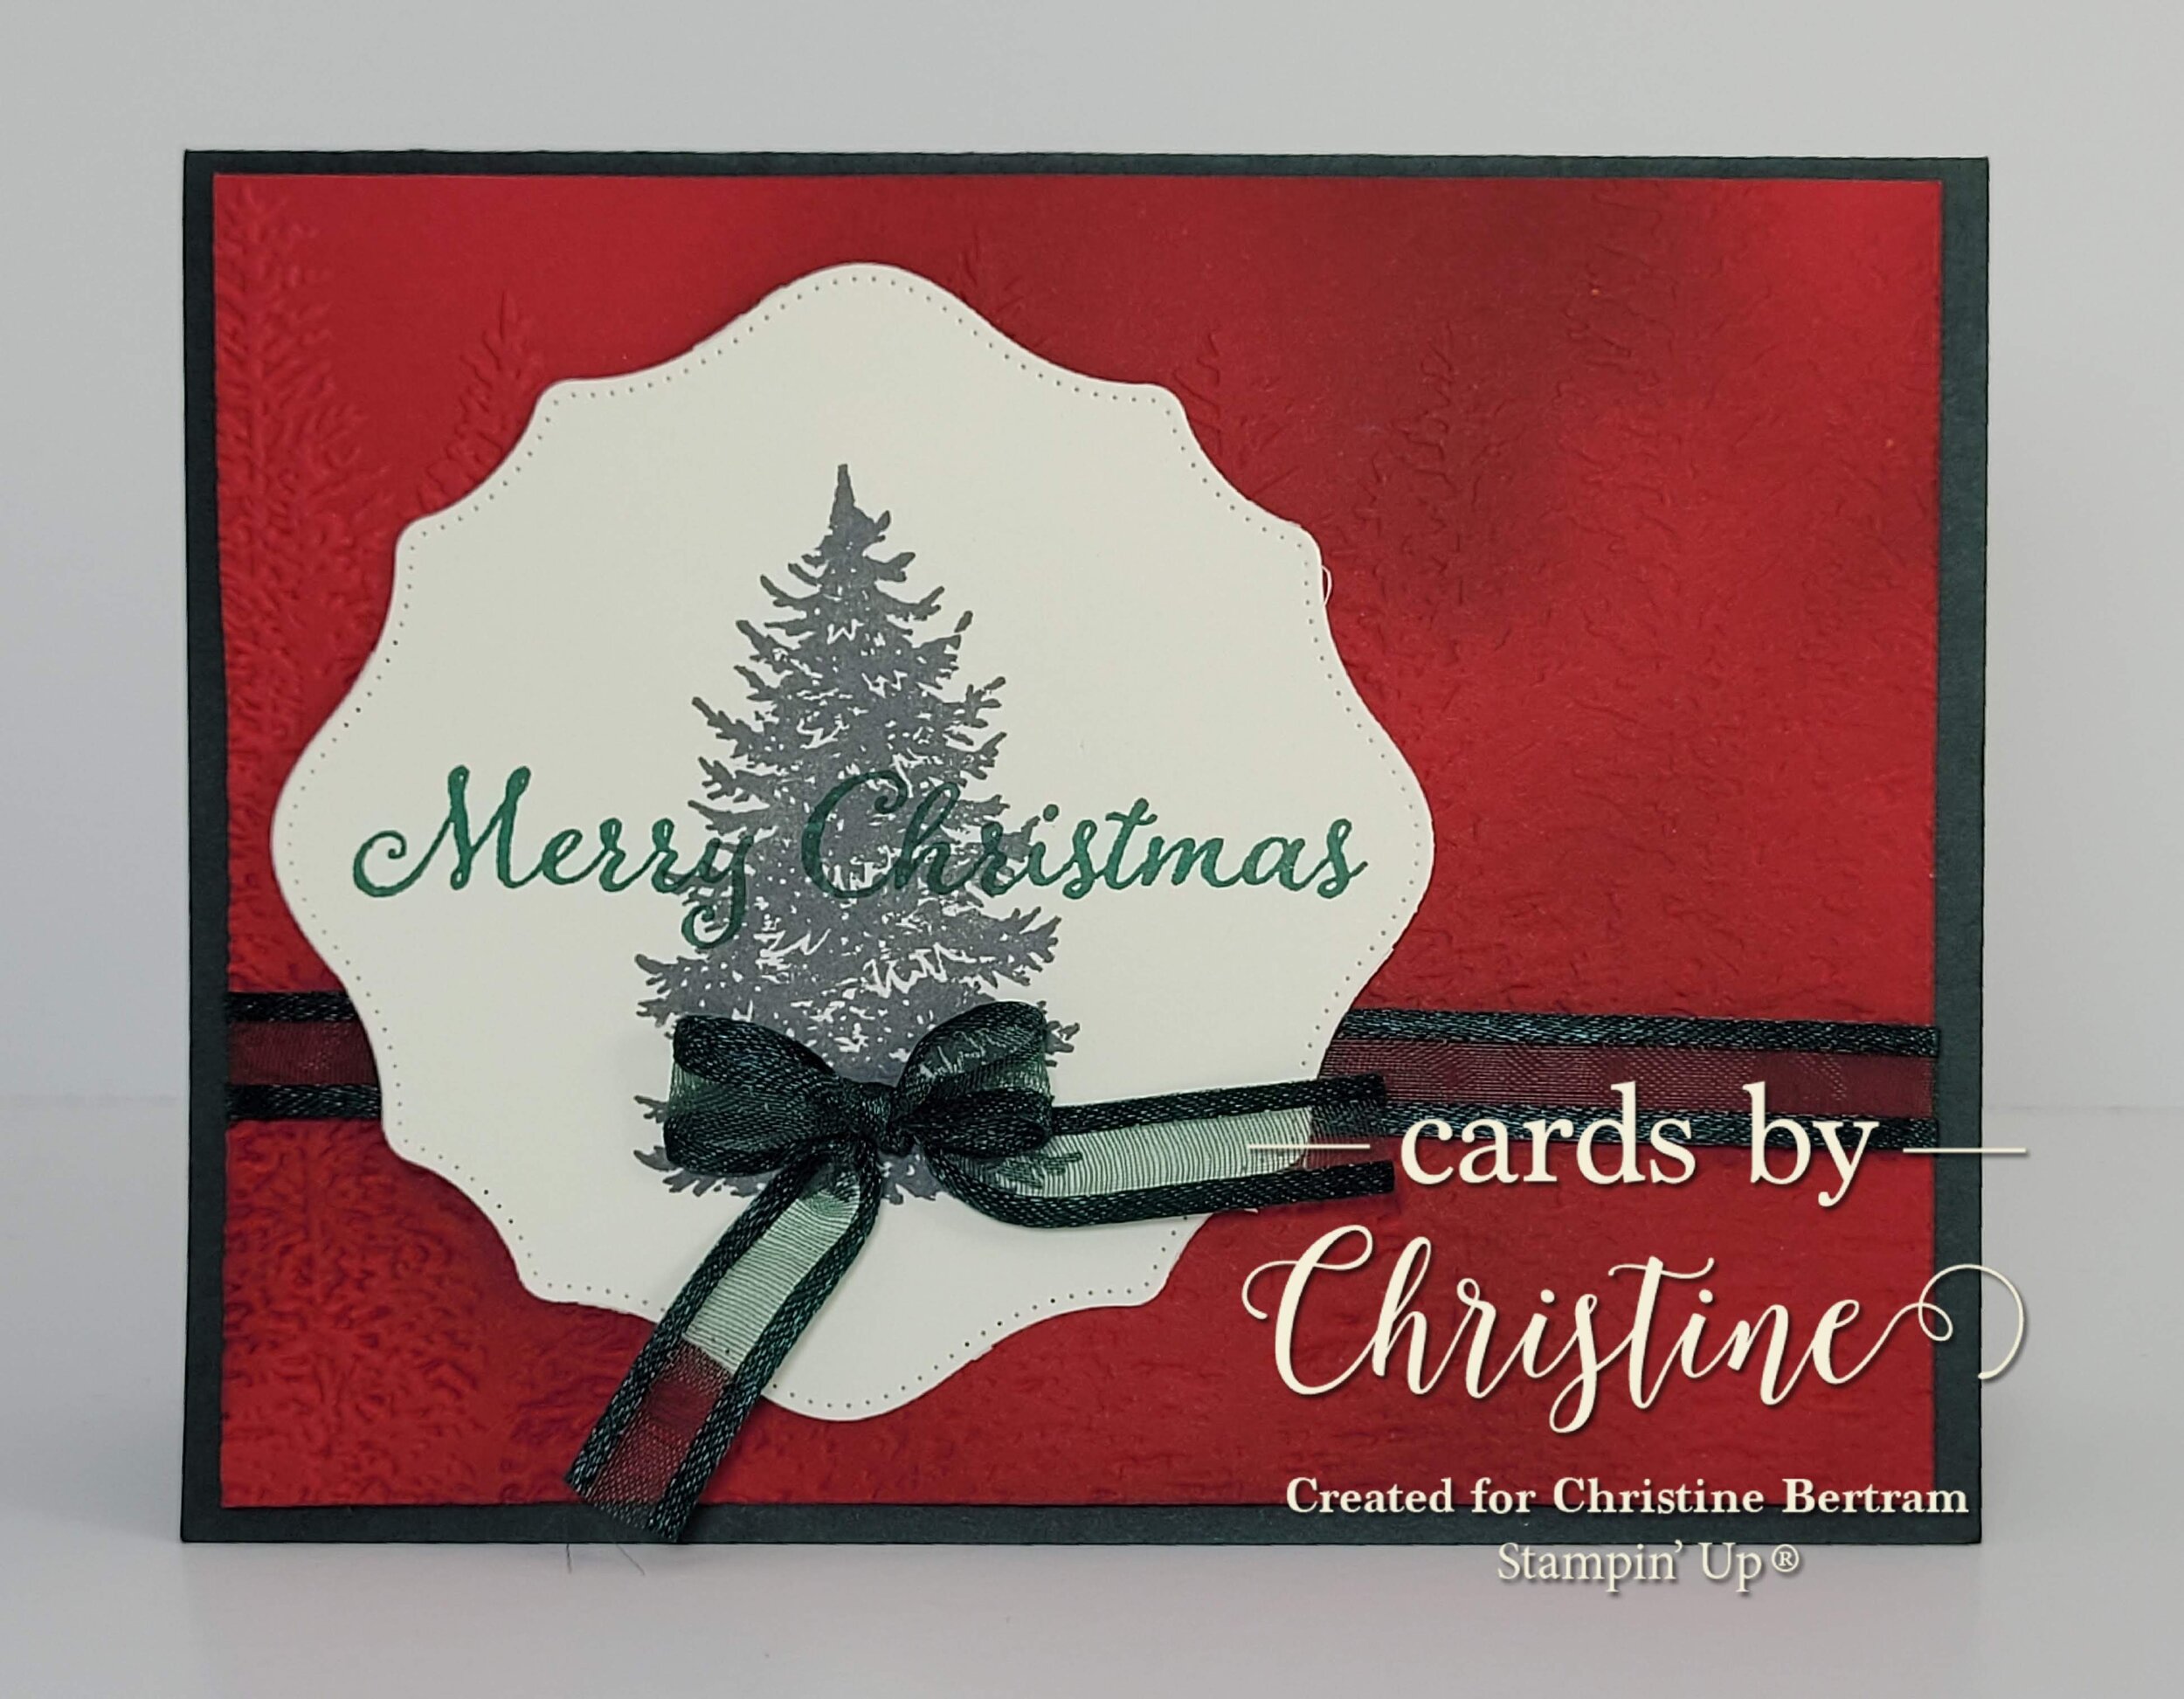
‘Tis the season to be jolly—and to start creating hand-stamped Christmas cards to make the season bright! If you’re thrifty, you may want to use parts and pieces that you already have. Dig into your treasure trove of scraps to see what gems you can find to make unique Christmas greetings—or CASE our samples using the products featured in these 4-1/4" x 5-1/2" (10.8 cm x 14.6 cm) cards:

  • Words of Cheer Bundle

  • Whimsy & Wonder Specialty Designer Series Paper

  • 2021–2023 In Color Cardstock

  • Mint Macaron Classic Stampin’ Pad

  • From My Heart Faceted Gems

We used the same elements for every card but made each one unique by moving things around—cutting an angle or banner tip here or sprinkling on a few gems there. But get creative—switch up the colors, add some embellishments or some ribbon! There are no hard and fast rules when it comes to creativity.

Most of all, have fun assembling your beautiful yuletide cards this year—made with love for friends and family.

Stepping It Up: Tidings & Trimmings

10.12_SUCCEED_WEEKLY_Small.jpg

‘Tis the season to start thinking about creating festive, handcrafted cards for Christmas! So if you’d like to start “wrapping up” your plans for a Yule-themed class or event, we’ve got you covered with a series of step-ups using the new Tidings & Trimmings Bundle.

CASUAL
To make the “Wunderschöne Weihnachten” card, stamp the berries in Cherry Cobbler Ink and the leaves in Soft Succulent Ink. Die cut the star and adhere it using Mini Glue Dots, placing the berries and the leaves on top. Layer with the stocking, stamped in Soft Succulent Ink on Basic White Cardstock (stamp off once!), and use Stampin’ Dimensionals to place the Cherry Cobbler sentiment with Petal Pink Cardstock on the top. This will create the gorgeous, layered look in an easy way!

AVID
We stepped up our “Wishing You a Joyful Christmas” card by using Blending Brushes and a little ink to create a soft, glowing background of the die-cut star. We also added banner tips to the Basic White Cardstock piece, amplifying the sophistication. And don’t you love the faux washi tape? Simply cut a strip of Designer Series Paper and rip the ends to get the look. Finally, add subtle color to the bow using Blender Pens.

ARTFULLY AVID
Our “Nos vœux de joyeux Noël” is filled with lavish detail, including a die-cut Vellum Cardstock embellishment, a Linen Thread bow, an extra stocking colored with Blender Pens, and a smattering of Elegant Faceted Gems. So pretty!

Simple Stamping with Designer Series Paper

9.28_SUCCEED_WEEKLY_Small.jpg

Do you have extra pieces of Designer Series Paper you’re not sure what to do with? Well, never fear! We have a few ideas to help you use your Designer Series Paper in unexpected ways!

Our concept artist did just that to create the Happiest of Birthdays card. Simply take some Whimsy & Wonder Specialty Designer Series Paper, throw in some Mint Macaron cardstock and a sweet birthday sentiment, and voila! You have an adorable birthday card made from leftover Christmas paper, and it’s so cute, no one can even tell.

In the Happy Birthday card, we wanted to emphasize the gorgeous Expressions in Ink Designer Series Paper. And who wouldn’t? We decided to let the paper do the heavy lifting and embellished it only with a simple sentiment and some metallic heat embossing. You’re sure to wow anyone with this stunning paper.

In our Birthday Wishes card, we used some Cute Halloween Designer Series Paper and blended Blushing Bride Ink with Blending Brushes, and created a sweet birthday card. Who knew that Halloween-themed paper could be used any time of the year?

These techniques are perfect for beginner stampers, and they help get rid of that stash of awkward Designer Series Paper pieces we know you have. So, break out your extra scraps of paper, go make some fun cards, and share them on social media!

Is It Okay to CASE?

0921_SUCCEED_WEEKLY_Small.jpg

“CASE” is an acronym used by papercrafters that means Copy and Share Everything.

When we say “copy,” we mean “allow yourself to be influenced by” another papercrafter’s projects. Be assured: It’s perfectly okay to do! Focus on some aspect of their handiwork that you absolutely love and use it to inspire your own creation.

Our concept artist CASEd a captivating “looks-hard-but-it’s-easy” technique to create the Ma Veritable Inspiration card. The trick here is to use a Water Painter to brush over the treetops and trunk to give them that watercolored look. Tip: Add more color to the tree leaves by picking up color from the ink pad.

The Du Bist Etwas Besonderes card features an inspirational, CASEd color combo. Begin by stamping a circle in the lightest ink—Bumblebee—then add the Misty Moonlight and Mossy Meadow circles to complete the composition. For crisp images, place the cardstock over a Stampin’ Pierce Mat before stamping.

Our last project, the You Are Fierce card, features a “wildly” creative, CASEd layout. We used the stamp set’s greenery images to create that purr-fect jungle vibe (and to fill in the corners). We die cut the tiger from Designer Series Paper. Isn’t he cute? Finish by layering the sentiment on top.

Stepping It Up: Nature’s Harvest

9.14.21_SSW_Small.jpg

CASUAL
To make the casual card, stamp the floral images in Crumb Cake ink on Basic White Thick Cardstock, then add color using Watercolor Pencils. Pro tip: Vary the pressure on your pencil to change the depth of color and use an Early Espresso pencil to increase the shading. (Notice the eye-catching use of Stampin’ Dimensionals for this card. The flowers practically jump off the page!)

AVID
We’re a little bit in love with the Designer Series Paper combination on this card. And the look is so easy to achieve. Simply use the Harvest Dies to cut the strips of Designer Series Paper. Stamp “Merci” on one of the strips for one more pretty layer. Pull on the Gold 3/8" (1 cm) Shimmer Ribbon edges to create a gorgeous accent.

ARTFULLY AVID
Our artfully avid version includes deep, rich colors created with the wide brush Water Painter to make the Linen Specialty Paper really come to life. Use Paper Snips to clean strings off the edges of the paper, and there you have it! Is this not a stunning card? You may want to make this one to frame and hang on your wall!

Get Ready to Keep Memories!

08.31.21_SUCCEED_WEEKLY_Small.jpg

The July–December 2021 Mini Catalog is full of beautiful ways to keep memories, including ideas for remembering the upcoming Christmas season. That’s right we said it—Christmastime is coming fast, but there are plenty of ideas to get you ready for the season, and we know you’ll want to keep all the memories!

That’s where the Gingerbread & Peppermint Memories & More Card Pack comes in—it’ll spruce up the way you bring in the season and help you make it last. You can make it into tags to add to sweet treats, as our artist did with the Sweet Christmas tag! Just cut Memories & More cards into strips and add in some ribbon to a Printed Gusseted Cellophane Bag, and your guests will be ready for a festive indulgence.

Memories & More Cards even make great banners! You can add photos to your banner to display them in a fresh, new way—or as a way to capture those memories. (Pro Tip: get a wooden skewer from a craft store and tie a ribbon or a piece of string to each end to create the effect that the banner is hanging. Pop the banner onto some Stampin’ Dimensionals to give it a detached look.) And voilà! You’re ready for any seasonal needs.

Make it Monday - Christmas in July

Photo_1625428931486.jpg

Can you believe that we are talking about Christmas already?! With the beautiful holiday products in the Annual Catalog and the STUNNING options coming up in the Holiday Mini, you will want to get a jump start on your holiday cards. There are so many great products to inspire your creativity, and I am always captivated by nature and trees, so the evergreen focal image and 3-D Embossing folder draw me in to this card. The new lineup of In-Colors features the deep green, Evening Evergreen, which is such a beautiful color to add to your Christmas color scheme. So many things to think about during the holiday season, alleviate the stress of holiday cards by getting a jump on them now! Special thanks to Bee Happy Stamper Mary Bohlman for creating this beautiful card to share with us.

Photo_1625438744699.jpg

Make it Monday - What's Cookin'?

Photo_1625429206023.jpg

Someone’s in the kitchen with the card maker! The details in this card really show off the beauty of the What’s Cookin’ Bundle, plus the fun “pop” of red compliments the neutral color pallet and hilights the beautiful coloring with our Stampin’ Blends. This bundle features coordinating dies and some intricate dies as well, especially the textured cutting board, which adds awesome detail to this card. Thanks to Bee Happy Stamper, Bonnie, for creating and sharing this beautiful card!

Photo_1625438740111.jpg

Make it Monday - Thinking of You

Photo_1625429481494.jpg

Sometimes “Simple Stamping” produces the most beautiful cards. I love how this card is quite simple, however it is truly a stunning card. The bamboo stems are distINKtive giving them different tones and variations, and I love how the leaves are stamped in Crumb Cake to give the card some additional depth while maintaining its monochromatic color scheme. Gilded Gems and Faux Suede Trim are the perfect way to finish off this card to give it an elevated, regal look!

Rhonda Eyers, Bee Happy Stampers team member, designed this beautiful card for our recent team swap! Thanks for sharing your beautiful work!

Photo_1625438737011.jpg

Simply Succulents Bundle

0421_MONTHLY_FOCUS_Small_SW.jpg

Succulents are sprouting up everywhere, and it’s a great time to add them to your crafting with the Simply Succulents Bundle. There’s so much to love in this bundle—sentiments that can be used all year, beautiful image and die coordination, and even a large die you can use to create masks, multiple smaller accents, or card fronts. There’s something for everyone, from casual stampers to experienced crafters.

Make-it Monday - Enjoy the Ride

20210128_174717.jpg

Life is a journey… enjoy the ride! That seems to take on new meaning after the journey we have been on the last year! I love the little cowboy riding his horse along the bottom of this card, designed by Bee Happy Stamper, Tammy. The color scheme is so warm and comforting and I love how she colored the linen thread to match the color scheme. I think we all could benefit from a beautiful card that reminds us to “enjoy the ride” as we journey through life!

20210128_174711.jpg

Butterfly Brilliance Bundle

0321_MONTHLY_FOCUS_Small.jpg

Did you know a group of butterflies (adorably) is called a kaleidoscope? I think that’s a brilliant name for brilliant bugs. In honor of all the kaleidoscopes in the world, Stampin’ Up! created the Butterfly Brilliance Bundle to celebrate their beauty and diversity. The bundle features butterflies from around the globe including Clouded Yellow (Europe), Black Veined White (Europe & Asia), Coppers (New Zealand), Swallowtail (North America), Blue Copper (North America), and Painted Lady (Australia).

This bundle is so versatile you can use your favorite technique! Use the large-image Butterfly Brilliance stamp as a background stamp, or pair it with the Brilliant Wings Dies to stamp and cut once for quick embellishments and accents. You can also color the line-art butterfly images using any coloring techniques. This bundle is excellent for masking. Plus, you can mix and match the bundle with your favorite greeting stamp sets to create cards and tags for every occasion.

A few things to know about the butterflies…

  • For a limited time, you can get the Butterfly Bijou Designer Series Paper and the Natural Touch Specialty Paper to coordinate with their Butterfly Brilliance Bundle. The Designer Series Paper includes bright tones and airy landscapes, perfect for fluttery friends. One sheet coordinates directly with the die so you can line it up and cut six butterflies at once. Get it all with the Butterfly Brilliance Collection (item 159408)!

  • It’s almost time for the new 2021–2022 Annual Catalog! This bundle is an early release from the catalog so get excited about the upcoming book and our fresh new offering!

Make-it Monday - Treasured Medallion

20210128_174328.jpg

The intricacies of this medallion image are beautiful, but mix them with regal gold using the heat embossing technique and you’ve got a STUNNING focal image! This birthday card features rich colors, bright metallics, and dainty details thoughtfully combined to make a simply gorgeous card. Great job Karissa, one of my Bee Happy Stampers, on creating this beautiful swap card!

MM_2.15.jpg

Start the New Year with Simple Stamping

SW_2.3.21.PNG

We’ve rung in the New Year, and with 2021 comes plenty of new reasons to stamp sweet cards for friends, neighbors, co‑workers, and anyone you know who could use a little cheer and encouragement. We recommend keeping your stamping simple. That way you will have tons of cards to give away in no time!

In fact, if you CASE the cards you see here, you’ll be halfway there! We added interest to these easy‑to‑make cards in three ways: We adhered Oh So Ombre Designer Series Paper strips at different angles for the You Did It card and stamped directly on this same Designer Series Paper with our Cue the Confetti and Whale Done cards. You can come up with other ideas by thumbing through the catalog!

Sale‑A‑Bration is here just until the end of the month, so don’t wait!

Make-it Monday - Hey Chick

20210128_174147.jpg

There are some fun new bundles launching TOMORROW that you won’t want to miss! Hey Birthday Chick (158631) and Hey Chick (158627) are a revival and expansion of a past SALE-a-Bration favorite. With new dies and another corresponding bundle, these cookie-chickens are a crowd-favorite that’s sure to please! Check out this AWESOME pop-up card my team member, Nancy made. I love the chick peeking out the window on the front, but nothing beats the scene on the inside! Are you going to be clicking “add to cart” tomorrow on these bundles? Don’t forget that you have until the end of the month to qualify for the great SALE-a-Bration items!

MM_2.1.21_2.jpg

Make-It Monday - Brushed Blooms

MM_1.25.21.jpg

There is no better reason to send a card than “just because”. In times like these, you really can put a smile on someone’s face by letting them know that you’re thinking about them and that you care! The beautiful “Brushed Blooms” bundle is a great, versatile set to make cards for no reason at all. The stamps depict beautiful brushstrokes, flower imagery and flowing sentiments. The set of dies features several layering flower cutouts and five color block brushstrokes. I love how Melisa, one of my fabulous Bee Happy Stampers, combined elements from the bundle to create this beautiful, monochromatic card!

It’s 2021! Time to Sale‑A‑Brate!

SW_1.6.21.PNG

If you’re new to Stampin’ Up!, you may not have heard about the happiest time of the Stampin’ Up! year. It’s called Sale‑A‑Bration, and it lasts from 5 January–28 February 2021. How can you take advantage of this exciting promotion? Simply Shop, Host, and Join so they can choose FREE gifts from Stampin’ Up!—just by placing a qualifying order. Browse the new mini catalog to make your wish list and check out the free goodies up for grabs in the Sale-a-bration catalog.

There could not be a better time than now to join my team of Bee Happy Stampers! Watch here for a rundown on that information OR reach out to me at any time with questions!

Simple Stamping Tips

One of the things people love about stamping is the simplicity of the experience. If you have stamps, ink, and cardstock, then with just a few minutes, you can make something satisfyingly beautiful with your own hands. Use these samples for inspiration to save even more time!

For two of today’s samples (the My Heart Is Wherever You Are card and the Happy Birthday card), you’ll notice that we’ve used a simple technique called stamping off. It’s a fun, easy way to get good looks and visual depth in seconds.

Here’s what you do:

  • Ink a stamp.

  • Stamp the image.

  • Re-stamp the image one or more times without re-inking.

This technique helps you get several shades of color from a single ink pad. (Quick tip: Use lighter ink for the base image and darker ink for the overlying image.)

For the Oh Baby card, we used another basic trick to create an easy-to-make project. First, we stamped the image of the lacy heart to create a simple frame, then adhered the stamped, punched out heart piece. Done! You could make tons of cards like this by the time you finish your morning coffee. It’s that easy.

Have fun simple stamping! And remember to share your work on social media. You never know who might be inspired!

Peaceful Nativity Step-Up

SW_12.16.20.PNG

CASUAL
To make the simplest version of this beautiful Christmas card, stamp the Jesus, Mary, Joseph, and stable images on the card front in Crumb Cake ink. Tip: Stamp off to create depth. Stamp Mary, Joseph, and Jesus again on a separate piece of cardstock, color with Watercolor Pencils, and cut out using the 1‑1/2" (3.8 cm) Circle Punch. Adhere the baby Jesus image using Stampin’ Dimensionals to make it the focal point of the card.

To create a glowing effect for the star of Bethlehem image, cut a small wedge from a Stamping Sponge. Dip the tip of the sponge in Frost White Shimmer Paint and dab it on the sky above the stable to create a background for the star. Such a lovely effect!

AVID
Step up the second card by die cutting the stable and star images using the Nativity Dies. (This time we stamped the stable image on Crumb Cake Cardstock and added color to the star using Daffodil Delight ink.) Dip a Water Painter in Frost White Shimmer Paint and splatter on the cardstock to create the impression of a sky full of stars.

ARTFULLY AVID
For our most detailed sample, we first laid down a watercolor wash on a layer of Fluid 100 Watercolor Paper. Once it was dry, we splattered water droplets and Frost White Shimmer Paint on the cardstock, creating the effect of a glowing night sky. As a finishing touch, we created manger "hay" by fraying the edges of a piece of 1/2" (1.3 cm) Vanilla Open Weave Ribbon from the Forever Greenery Trim Combo Pack, folding it in half, and placing it under the baby Jesus.